
Have you ever looked in your pantry and wondered if that humble bag of rice could be the secret to more radiant skin? Well, it just might be!
While we’ve all been cooking rice for dinner, women across Asia have been using it as a beauty treatment for centuries.
And now this well-kept secret is finally getting the attention it deserves!
If you’re noticing your skin doesn’t have quite the same glow it used to, or if gravity seems to be working overtime on your face lately, a rice face mask might be exactly what you need.
The best part?
You don’t need to spend a fortune or decipher complicated ingredient lists everything you need is probably sitting in your kitchen right now.
As we journey through our 40s and beyond, our skin craves different care than it did in our younger years.
It needs gentle, effective ingredients that hydrate, brighten, and yes help with that little bit of tightening we’re all looking for.
Rice is packed with nutrients that do exactly that, and I’m going to show you how to harness its power in a simple mask you can make at home.
So let’s dive into this natural beauty secret that luxury skincare brands don’t want you to discover!
The Secret Skin Benefits of Rice (That Luxury Brands Don’t Want You to Know)

Before we start mixing up our mask, let’s talk about why rice is such a skincare superstar. This ordinary grain has some extraordinary benefits for mature skin:
First, rice contains natural compounds that help brighten your complexion.
Remember how your mom or grandmother might have used rice water to rinse clothes and make them look whiter?
It works similarly on your skin, gently fading dark spots and evening out your skin tone.
Rice is also packed with vitamins B and E, which are essential for skin health and repair.
These vitamins help strengthen your skin barrier something that becomes increasingly important as we age and our skin gets thinner and more delicate.
Perhaps most impressive is rice’s natural ability to tighten skin. It contains inositol, a compound that promotes cell growth and stimulates blood flow.
This helps improve elasticity, giving your skin a firmer, more youthful appearance without harsh chemicals.
The starch in rice also has anti-inflammatory properties, which means it can calm redness and irritation perfect if your skin has become more sensitive over the years (another common change as we age).
And here’s something amazing: rice contains a natural sunscreen called ferulic acid, which helps protect your skin from UV damage. While it’s not a replacement for your regular SPF, it’s a nice bonus benefit!
No wonder Korean and Japanese women have been using rice in their beauty routines for generations! And now we can bring this time-tested tradition into our own bathrooms.
Simple Ingredients You’ll Need for Your Rice Face Mask
The beauty of this mask is its simplicity. You don’t need a long list of exotic ingredients or special equipment just a few basic items you probably already have:
Basic Ingredients:
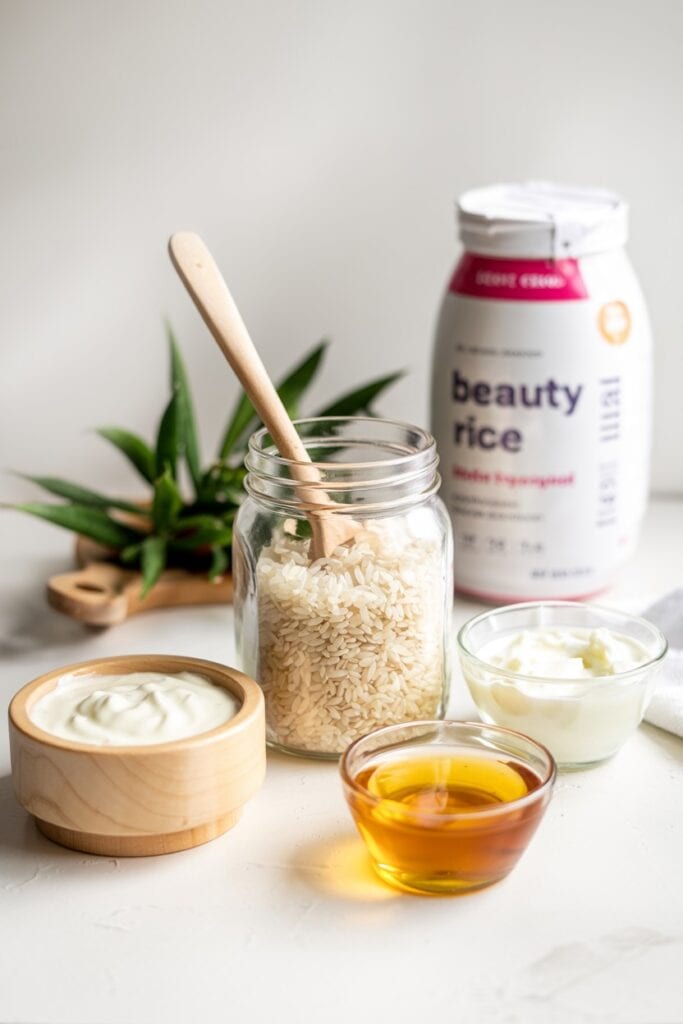
- ¼ cup uncooked rice (white rice works best, but brown rice is fine too)
- Water
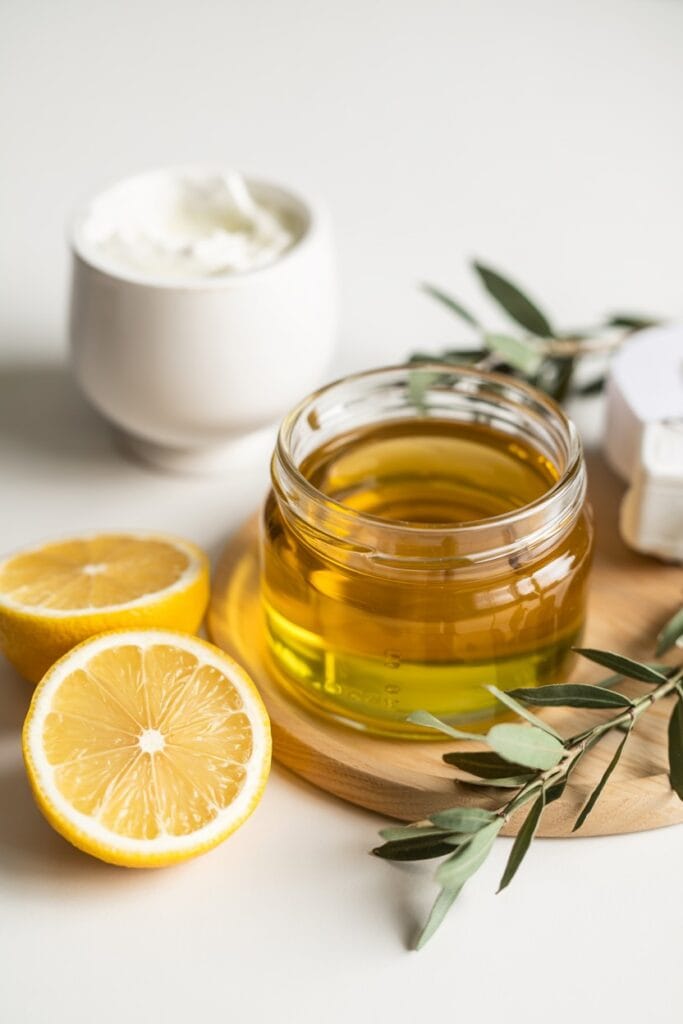
- 1 tablespoon plain yogurt (Greek yogurt is perfect)
- 1 teaspoon honey
That’s it for the basic recipe! But depending on your skin’s specific needs, you might want to add one of these optional boosters:
Optional Add-ins:
- ½ teaspoon olive oil (if your skin is especially dry)
- A few drops of lemon juice (for extra brightening power)
- ¼ teaspoon turmeric (for additional anti-inflammatory benefits)
When choosing your rice, any type from your pantry will work, but white rice tends to have the most brightening effects.
If you want to get fancy, you can try jasmine or basmati rice, which have lovely natural fragrances.
Store your beauty rice separately from your cooking rice to keep things organized.
A small jar labeled “Beauty Rice” works perfectly and makes the whole process feel more special like your own little spa moment!
The Basic Rice Mask Recipe Anyone Can Make
Now let’s get to the fun part making your mask! This process is simple enough to do while helping the kids with homework or catching up on your favorite show:
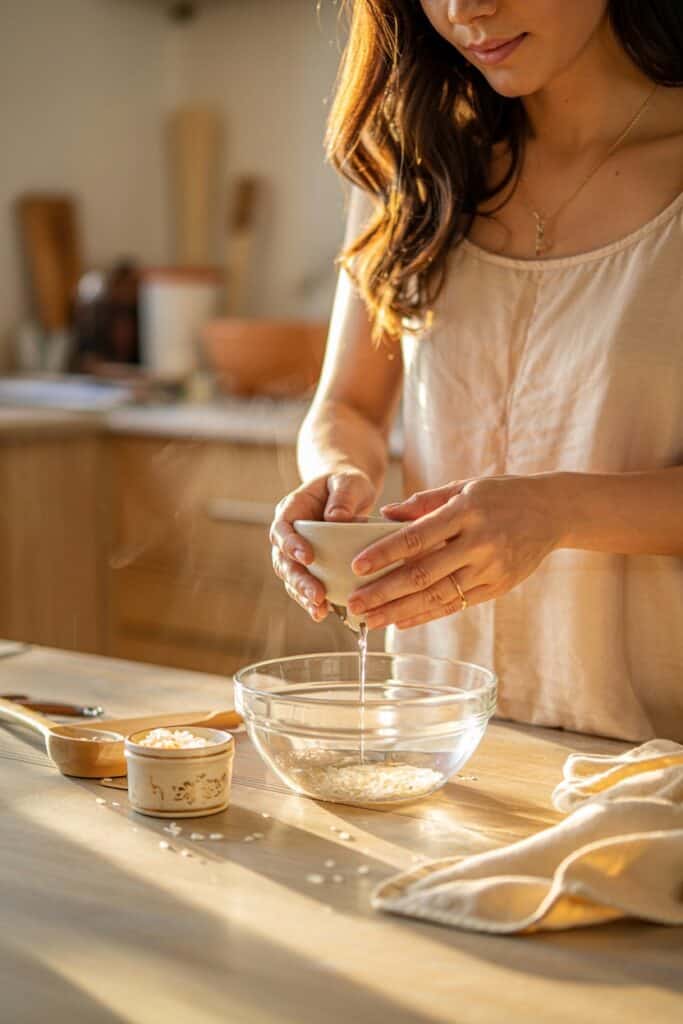
Step 1: Prepare the Rice Water
- Rinse ¼ cup of rice with cool water to remove any dust or impurities.
- Place the rinsed rice in a bowl and add 1 cup of water.
- Let it soak for 30 minutes. (This is a great time to take a shower, answer some emails, or just enjoy a cup of tea!)
- After soaking, strain the rice, keeping BOTH the rice and the water. The water is liquid gold for your skin, so don’t throw it away!
Step 2: Make the Rice Paste
- Take the soaked rice and grind it into a paste. You can use a blender, food processor, or even a mortar and pestle if you’re feeling traditional.
- The consistency should be somewhat smooth but not completely liquified a little texture is good for gentle exfoliation.
Step 3: Mix Your Mask
- In a clean bowl, combine 2 tablespoons of your rice paste with 1 tablespoon of plain yogurt.
- Add 1 teaspoon of honey and mix well.
- If you’re using any optional ingredients, add them now and stir until everything is well combined.
Your mask should have a creamy, slightly grainy texture that spreads easily but won’t drip down your face.
If it seems too thick, add a teaspoon of your reserved rice water to thin it out. If it’s too runny, add a bit more rice paste.
That’s it! Your brightening and tightening rice face mask is ready to use.
The whole process takes about 40 minutes, but most of that is just waiting while the rice soaks the actual hands-on time is less than 10 minutes.
3 Ways to Customize Your Rice Mask for Your Skin’s Needs
While the basic recipe works wonders for most skin types, you might want to tailor your mask to address specific concerns. Here are three variations to try:
For Extra Brightening:
Add ½ teaspoon of lemon juice to your basic mask mixture. The natural acids in lemon help to gently exfoliate and fade dark spots. This version is perfect if you’re dealing with sun damage or age spots.
For Deep Hydration:
Mix in ½ teaspoon of olive oil and a drop of vitamin E oil (you can puncture a vitamin E capsule). This combination is especially good for dry or mature skin that needs extra moisture. Use this version in winter months when indoor heating can leave skin parched.
For Firming and Tightening:
Add 1 teaspoon of egg white (whisked until slightly frothy) to your basic mask. The proteins in egg white create a temporary tightening effect that’s perfect before special occasions when you want to look extra refreshed.
Remember, your skin’s needs might change with the seasons, your stress levels, or even your hormonal cycles.
Don’t be afraid to experiment until you find what works best for you. The wonderful thing about natural ingredients is that they’re generally gentle enough to allow for some trial and error.
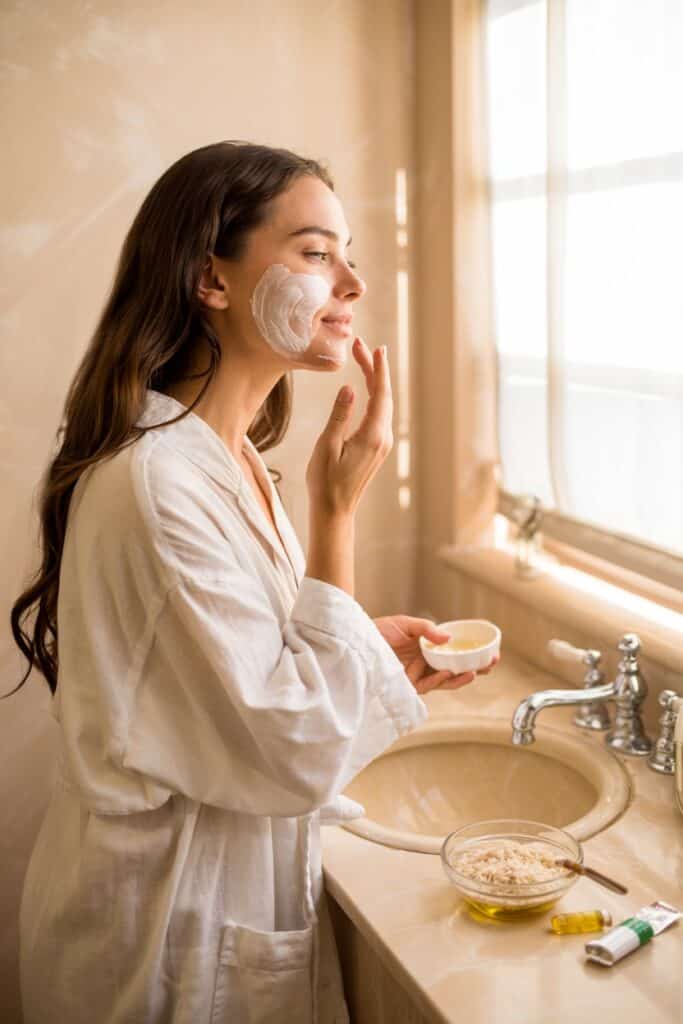
The Right Way to Apply Your Rice Mask (Without the Mess!)
Now that your mask is ready, let’s talk about application. This part is important the right technique helps you get the most benefits while avoiding unnecessary mess:
- Start with clean skin: Wash your face with your regular cleanser and pat it dry. This ensures the mask can work directly on your skin without having to fight through makeup or daily grime.
- Protect your clothes: Even though this mask isn’t as colorful as turmeric or charcoal versions, it can still get messy. Wear an old t-shirt or drape a towel around your shoulders.
- Use the right tools: Apply the mask with a facial brush if you have one, or clean fingers if you don’t. A brush gives the most even application, but fingers work perfectly fine too.
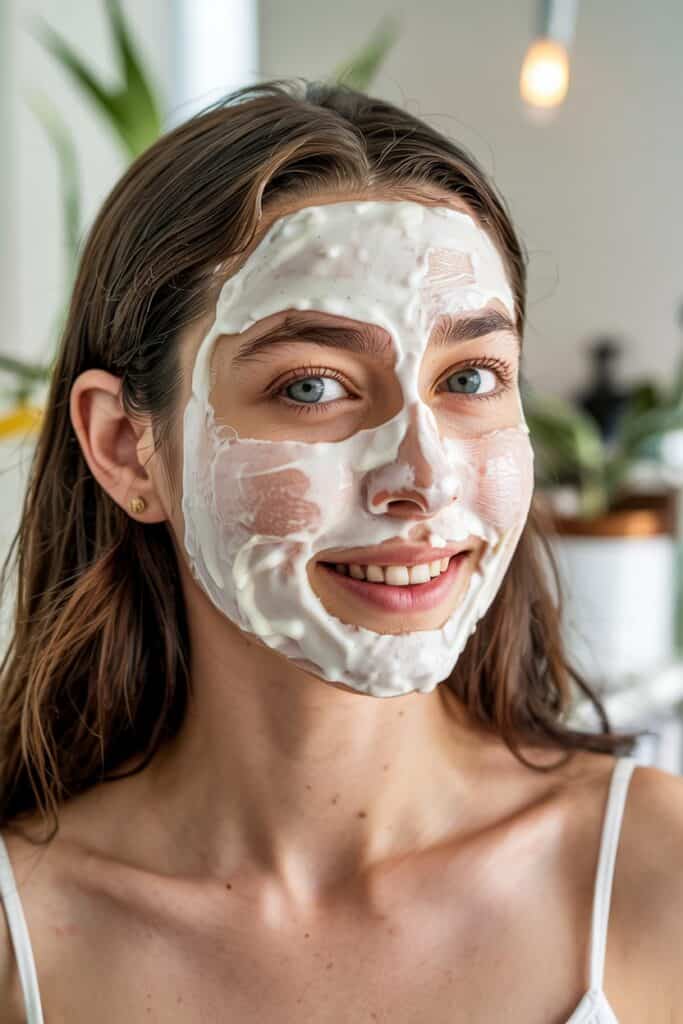
- Apply in upward motions: Always spread the mask upward and outward, working against gravity. This simple technique provides a mini facial massage that helps with circulation and absorption.
- Don’t forget your neck: Our necks show age just as much as our faces, but they often get neglected in skincare routines. Extend your mask application down to your neck and even your décolletage area.
- Mind the sensitive areas: Apply the mask more thinly around your eyes and avoid getting too close to your lash line. The skin here is delicate and doesn’t need as much product.
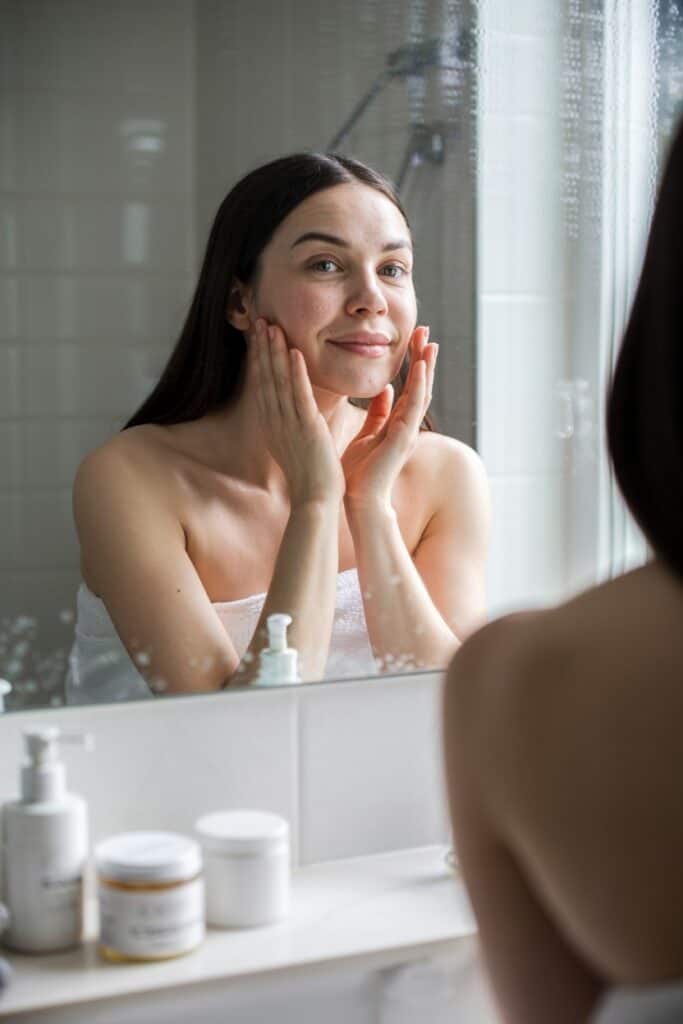
Once applied, your face will be covered with a creamy, slightly textured layer that might feel cool and refreshing on your skin. Now it’s time to relax and let the mask work its magic!
How Long to Leave It On (And What to Do While You Wait)
For best results, leave your rice mask on for 15-20 minutes. This gives the ingredients enough time to work without drying out your skin.
While you wait, resist the urge to touch your face or make exaggerated expressions that might crack the mask.
Instead, use these minutes as a little gift to yourself:
- Do some gentle stretching
- Practice deep breathing
- Listen to a favorite song
- Read a few pages of that book on your nightstand
- Simply close your eyes and enjoy the quiet
This isn’t just good for your skin – it’s good for your mind too. In our busy lives, these small moments of stillness are precious. Think of your mask time as a mini-meditation that benefits both your skin and your stress levels.
If you feel the mask starting to tighten or dry out before the 20 minutes are up, it’s time to rinse.
Different environments and skin types can affect drying time, so always listen to what your skin is telling you.
Removing Your Mask the Right Way for Maximum Benefits
The way you remove your mask is just as important as how you apply it. Follow these steps for the best results:
- Use lukewarm water: Hot water can be too harsh and strip away natural oils, while cold water won’t remove the mask effectively.
- Splash gently: Start by splashing your face with water rather than using a washcloth right away. This begins to dissolve the mask without rough rubbing.
- Massage in circles: As the mask softens with water, gently massage your skin in small circular motions. This provides light exfoliation from the rice particles.
- Rinse thoroughly: Make sure to remove all traces of the mask, especially along the hairline and jawline where product can hide.
- Pat, don’t rub: Use a soft towel to pat your face dry. Rubbing can irritate your freshly treated skin.
After removing the mask, your skin should feel soft, smooth, and slightly tighter.
You might notice an immediate brightening effect, especially if you’ve included lemon juice in your recipe.
The Rice Water Bonus: Don’t Throw That Water Away!
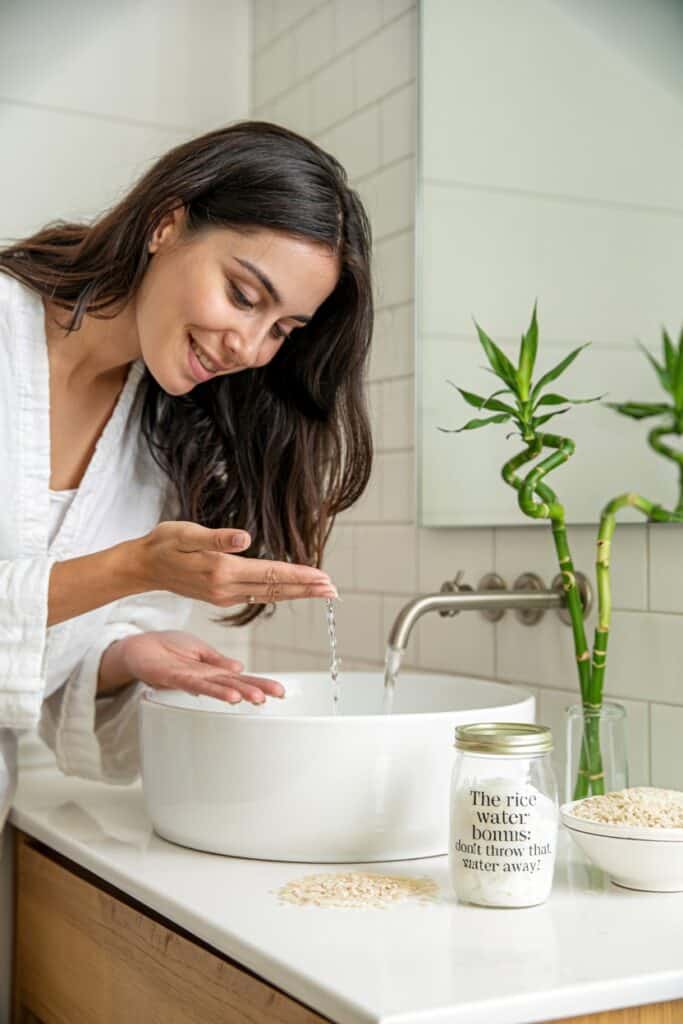
Remember the rice water you saved from the soaking step?
This liquid is a skincare treatment all on its own! Rice water has been used for centuries in Asian beauty rituals, and for good reason.
Here’s how to use your leftover rice water:
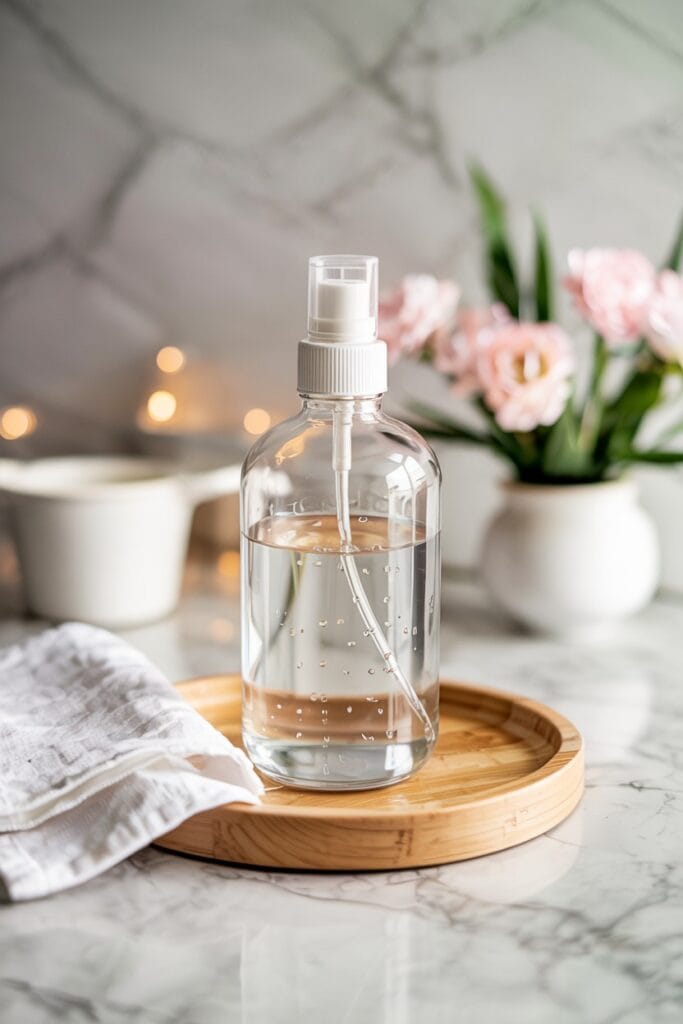
As a Facial Toner:
- Pour some rice water into a clean bottle with a spray top or a small container.
- After cleansing, apply the rice water to your face using a cotton pad or by patting it on with your hands.
- Allow it to air dry before applying moisturizer.
As a Hair Rinse:
- After shampooing, pour rice water over your hair.
- Massage it into your scalp and through the lengths.
- Leave it on for 5-10 minutes before rinsing.
- Enjoy softer, shinier hair!
For Soothing Skin Irritation:
- Soak a clean cloth in cold rice water.
- Apply as a compress to sunburned skin or irritated areas.
- The anti-inflammatory properties help calm redness and discomfort.
Rice water can be stored in the refrigerator for up to a week.
Some women even freeze it in ice cube trays to use as refreshing facial ice cubes on hot summer mornings!
Your Simple Rice Mask Schedule for Visible Results
Consistency is key with natural skincare. Here’s a simple schedule to help you get the most from your rice mask:
For Normal to Dry Skin:
Use the mask once a week. This provides regular benefits without overdoing it.
For Oily or Combination Skin:
You can use the mask twice a week if needed. The rice helps absorb excess oil while still providing hydration.
For Special Occasions:
Apply your mask the day before a big event for an extra glow. The brightening effects are often most noticeable 12-24 hours after application.
Most women notice immediate results after the first use primarily softer, more radiant skin. But the cumulative benefits are even better.
After 3-4 weeks of regular use, you might see:
- More even skin tone
- Reduced appearance of dark spots
- Improved firmness
- A natural, healthy glow
- Smaller-looking pores
Keep track of your progress by taking a “before” photo before starting your rice mask routine, then another photo after a month.
The changes might be subtle, but they add up to a noticeable improvement in your skin’s appearance and health.
Beyond the Face: Other Ways to Use Rice in Your Beauty Routine
Once you’ve fallen in love with your rice face mask, you might want to explore other ways to use rice in your beauty routine:
Rice Body Scrub:
Mix your rice paste with a bit of coconut oil and use it as a gentle exfoliator for rough areas like elbows, knees, and feet.
Rice Hand Treatment:
Our hands often show age even more than our faces. Apply your rice mask to the backs of your hands once a week to help fade age spots and improve texture.
Rice Soak for Nails:
Soaking your fingertips in rice water for 10 minutes can help strengthen brittle nails and soften cuticles.
Rice Water Hair Spray:
Fill a spray bottle with rice water and use it as a leave-in treatment for hair. It adds shine and helps reduce frizz.
The versatility of rice as a beauty ingredient means you can create an entire self-care routine from this one simple pantry staple. It’s economical, effective, and environmentally friendly beauty that feels good in every way.
Simple, Natural Beauty That Actually Works
In a world of complicated 12-step skincare routines and expensive miracle products, there’s something refreshingly honest about a rice face mask.
It doesn’t make outlandish promises or come in fancy packaging. It simply works, gently and effectively, the way nature intended.
As we navigate the changes that come with aging, finding simple, reliable beauty solutions becomes more valuable than ever.
We don’t need more complication in our lives we need things that work without adding stress or breaking the bank.
This rice mask is exactly that kind of solution. It connects us to traditional wisdom that has served women well for generations.
It reminds us that effective skincare doesn’t have to be complicated or expensive. And most importantly, it helps us feel good in our skin at every age.
So the next time you’re cooking rice for dinner, set a little aside for your beauty routine. Your skin will thank you with a brighter, tighter, more radiant glow no expensive products required!
Have you tried rice in your skincare before? I’d love to hear about your experience in the comments! And if you make this mask, take a before and after selfie to track your results you might be amazed at the difference!